Table of Contents
What is Goreleaser?
GoReleaser is a popular tool designed to simplify the process of releasing Go applications and libraries. It automates the building, packaging, and publishing of Go binaries for multiple platforms, allowing developers to distribute their Go programs more easily.
Using GoReleaser
Installation
Detailed installation instructions can be found in the official documentation. As I am using macOS, I installed it with Homebrew:
brew install goreleaser/tap/goreleaser
Initialize GoReleaser
To initialize GoReleaser, run the following command in your project directory:
goreleaser init
It will create a .goreleaser.yml file in your project directory. This file stores the configuration (target operating systems, architectures) of GoReleaser.
Example .goreleaser.yml file
You can use the boilerplate below as a starting point for your own .goreleaser.yml file. It will build your project for Linux, Windows, and MacOS. It generates checksums for binaries and creates a changelog from git commits. It also creates a GitHub release draft.
before:
  hooks:
    - make build

builds:
  - env:
      - CGO_ENABLED=0
    goos:
      - linux
      - windows
      - darwin
    goarch:
      - amd64
      - arm64

archives:
  - format: tar.gz
    # this name template makes the OS and Arch compatible with the results of `uname`.
    name_template: >-
      {{ .ProjectName }}_
      {{- title .Os }}_
      {{- if eq .Arch "amd64" }}x86_64
      {{- else if eq .Arch "386" }}i386
      {{- else }}{{ .Arch }}{{ end }}
      {{- if .Arm }}v{{ .Arm }}{{ end }}
    # use zip for windows archives
    format_overrides:
      - goos: windows
        format: zip

checksum:
  name_template: '{{ .ProjectName }}_checksums.txt'

snapshot:
  name_template: '{{ .Tag }}'

changelog:
  sort: asc
  filters:
    exclude:
      - '^docs:'
      - '^test:'
      - Merge pull request
      - Merge branch

release:
  draft: true
By running goreleaser check you can validate your configuration file before pushing it to your repository.
Tagging a release
Before releasing your project, you need to tag a release. You can create a tag for the latest commit with the following command:
git tag -a v0.1.0 -m "first release"
Then you can push the tag to your repository:
git push --follow-tags
Releasing a New Version
There are two ways to release your project with GoReleaser. You can release from your local machine or from GitHub Actions. But before that, you need to obtain a GitHub token.
Get a token on GitHub
Go to https://github.com/settings/tokens?type=beta and generate a new token. You need to select the following scopes:
- Contents Repository contents, commits, branches, downloads, releases, and merges. Read/Write

Copy the token and save it somewhere safe. You will need it later.
Releasing from your local machine
If you want to release from your local machine, you need to set the GITHUB_TOKEN environment variable:
export GITHUB_TOKEN="YOUR_GH_TOKEN"
Then you can release your project with the following command:
goreleaser release
Note that Goreleaser will use the latest tag to create a release by default.
Releasing with GitHub Actions
Even the free plan of GitHub Actions allows you to run some minutes of workflow for free. You can use these minutes for building and releasing your apps when you push a new tag to your repository.
To achieve that, you need to create a new workflow file in your .github/workflows directory. You can name it goreleaser.yml. Here is an example workflow file:
name: goreleaser
on:
  push:
    tags:
      - 'v*'
jobs:
  goreleaser:
    runs-on: ubuntu-latest
    steps:
      - name: Checkout
        uses: actions/checkout@v2
        with:
          fetch-depth: 0
      - name: Set up Go
        uses: actions/setup-go@v2
        with:
          go-version: '1.20'
      - name: Run GoReleaser
        uses: goreleaser/goreleaser-action@v2
        with:
          version: '1.21.2'
          args: release --rm-dist
        env:
          GITHUB_TOKEN: ${{ secrets.GORELEASER_TOKEN }}
This workflow will run when you push a new tag (if the tag starts with v, you can change that in the configuration file above.) to your repository. It will build your project by using the .goreleaser.yml file in your project root. As I mentioned before, you can set target operating systems and CPU architectures in that file. Then it will create a draft release on GitHub. You can edit the draft and publish it when you want.
But this workflow will fail because it cannot find the GITHUB_TOKEN variable.
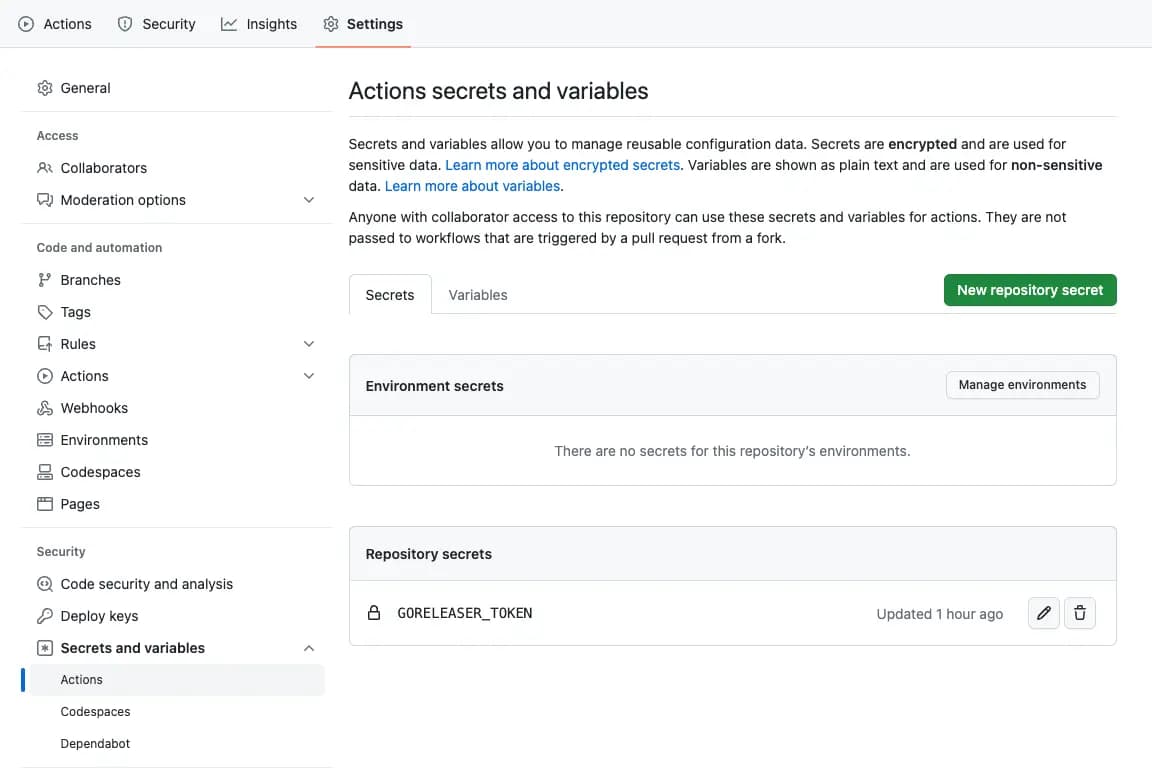
To fix that, you need to create a new secret in your repository. Go to
https://github.com/{GITHUB_USERNAME}/{REPO_NAME}/settings/secrets/actions

Create a new secret with the name GORELEASER_TOKEN and paste your GitHub token created before.
Now you can push a new tag to your repository and see the workflow in action. Depends on your project and targets, it may take some time to complete (5-15 min) the workflow.